Want to install recessed lighting yourself? Togalonn provides detailed steps, including time estimates, difficulty assessments, and practical tips, to help you easily install recessed lighting and enhance your home lighting.
Table of Contents:
1. What is Recessed Lighting?
1.1 Introduction to Recessed Lighting
1.2 Features and Advantages of Recessed Lighting
2. Choosing the Right Recessed Lighting
2.1 How to Choose Recessed Lights Based on Room Size
2.2 Choosing the Light Source: LED vs. Incandescent Bulbs
3. Preparation Before Installing Recessed Lights
3.1 Difficulty and Time Required for Installation
3.2 Tools and Materials Needed
3.3 Recommended Spacing for Installing Recessed Lights
4. Recessed Lighting Installation Steps
4.1 Planning the Layout
4.2 Cutting the Ceiling Holes
4.3 Wiring and Connecting the Fixtures
4.4 Installing the Junction Box
4.5 Installing the Recessed Fixtures
4.6 Installing the Bulbs
4.7 Turning on the Power and Testing the Lights
4.8 Final Adjustments
5. Maintenance and Care for Recessed Lights
5.1 How to Clean Recessed Lights
5.2 Regular Checks and Bulb Replacement
6. Conclusion
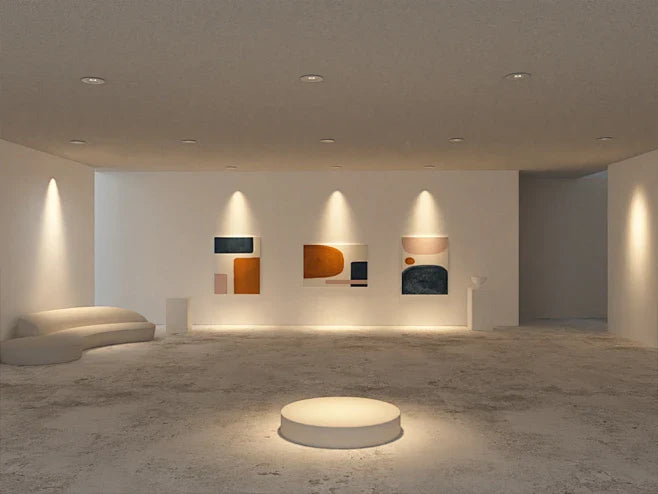
Introduction to downlights

Downlights are a type of lamp embedded in the ceiling. They usually have a round or square shape and are installed in the ceiling through a hole, but there are also external surface-mounted downlights. Downlights have stronger focusing than ordinary surface-mounted lamps. They are used for general lighting or auxiliary lighting. The light is relatively soft, which can not only achieve basic lighting, but also set the atmosphere.
Features and advantages of downlights
l Super long life: Downlights have a long life, usually up to 30,000 to 50,000 hours.
l Wide range of use: Home lighting, office lighting, ceiling lighting, community lighting, stalls and shops, shopping malls and supermarkets, restaurants and hotels, bars, Western restaurants, cafes, family night lights, urban lighting and beautification projects, etc.
l Green and environmentally friendly: No ultraviolet and infrared radiation, and does not contain harmful substances, in line with environmental protection standards.
l Space saving: Due to its embedded design, downlights do not take up extra space and are suitable for rooms with low ceilings or limited space.
l Safety and durability: Good heat dissipation can effectively reduce the temperature, thereby reducing the risk of fire. Compared with traditional lamps, downlights have a more compact and sturdy structure and higher durability.
Choose the right downlight

The number of downlights depends on the room's area, ceiling height, and lighting requirements. Here are some common reference data:
| Room Area | Recommended Number of Downlights | Notes |
| 5-10 square meters | 4-6 | Suitable for small spaces like bathrooms, small bedrooms, or storage rooms. |
| 10-15 square meters | 6-8 | Suitable for medium-sized spaces like bedrooms, studies, or kitchens. |
| 15-20 square meters | 8-12 | Suitable for areas requiring stronger lighting, such as living rooms or dining rooms. |
| 20-30 square meters | 12-16 | Suitable for larger living rooms, open kitchens, or small meeting rooms. |
| 30+ square meters | 16-20 or more | Suitable for large meeting rooms, banquet halls, or open office areas, requiring zoned lighting. |
Tips:
1.If the room's ceiling height exceeds 3 meters, consider increasing the number of downlights or choosing higher-wattage fixtures.
2.If the room has special functional areas (e.g., dining tables, desks, sofa areas), additional local lighting can be added.
Choosing the Light Source: LED vs. Incandescent

| Comparison | LED Recessed Lights | Incandescent Lights |
| Energy Efficiency | High, consumes less energy | Low, consumes more energy |
| Lifespan | Long, typically 25,000-50,000 hours | Short, usually around 1,000 hours |
| Brightness | Provides the same brightness with less energy consumption | Lower brightness, consumes more power |
| Light Source | Semiconductor, generates light through electrical current | Generates light by heating a filament |
| Heat Output | Low, generates less heat | High heat output, prone to overheating |
| Environmentally Friendly | No harmful substances (e.g., mercury) | Contains harmful substances (e.g., tungsten) |
| Color Temperature | Adjustable, common color temperatures: 2700K-6500K | Primarily warm white, around 2800K |
Tips:If you prioritize energy savings, long lifespan, and environmental friendliness, LED recessed lights are the better choice.
Preparation before installing downlights
1. Difficulty and time required for downlight installation
Difficulty: Medium (suitable for DIY enthusiasts with certain hands-on skills).
Time required: About 2-4 hours (depending on the size of the room and the number of installations).
2. Required tools and materials
Before starting the installation, please prepare the following tools and materials: Tools and materials: Electric drill, drywall saw, wire stripper, screwdriver, voltage tester, downlight kit (including lamp holder and lampshade), LED bulb, wire connector, insulating tape, etc.
3.Recommended spacing for installing downlights
Planning the Spacing of Downlights
The spacing of downlights directly affects the uniformity of light. Generally, the spacing should be determined based on the room height and the beam angle of the fixtures. Here are some common reference data:
| Room Height | Recommended Downlight Spacing | Notes |
| 2.4-2.7 meters | 1.2-1.5 meters | Suitable for standard residential spaces, ensuring even light distribution and avoiding overcrowding or gaps. |
| 2.7-3.0 meters | 1.5-1.8 meters | Suitable for rooms with higher ceilings, where spacing can be slightly increased. |
| 3.0+ meters | 1.8-2.0 meters | Suitable for commercial spaces or high-ceiling areas, requiring high-wattage fixtures. |
Tips:
If adjustable downlights are used, the spacing can be slightly increased as the light direction can be adjusted.
In edge areas (e.g., near walls), the distance between downlights and the wall should be 0.5-0.8 meters to avoid concentrated light on the wall causing unevenness.

Downlight Installation Steps
Step 1: Plan the Layout
Mark the locations where you want to install the lights with a pencil, making sure they are centered and aligned correctly
· Spacing: To distribute the light evenly, measure the spacing between the lights in advance
· Avoid shadows: Make sure the lights are placed where they will not create unnecessary shadows
· Room zones: Consider different zones (e.g., specific areas of the kitchen or living room)
Step 2: Cut the Ceiling Hole

Use a stud finder to check if there are any beams or joists that will interfere with the installation of the light fixture. Once you have marked the location where the light fixture will be installed, use an electric drill with a hole saw attachment to cut the hole in the ceiling.
Step 3: Wiring and Light Fixture Connections
Before proceeding with wiring, make sure the power is off at the breaker box.
l Connect the wires: Strip the wires and connect the corresponding wires on the light fixture to the wires on the ceiling. Typically, you connect the black (hot) wire to black, the white (neutral) wire to white, and the ground wire to the ground screw or green wire. Secure the connection with a wire nut.
Tips: Double-check all connections with electrical tape to make sure they are properly insulated.
Step 4: Install the Junction Box
l To ensure a secure installation, secure the junction box to the ceiling using screws or brackets. This will house the electrical connections for the recessed light fixture.
Step 5: Install the Recessed Light Fixtur
Once the wiring is complete and secured, it's time to install the fixture. Follow the manufacturer's instructions to mount the recessed light fixture to the ceiling. Most fixtures come with clips or springs to hold the light in place. Make sure the fixture is flush with the ceiling for a clean look.

Step 6: Turn on the Power and Test the Lights
Once everything is connected and installed, turn the power back on at the breaker box. Test the lights to make sure they're working properly. If they flicker or don't light up, check the connections and make sure the bulb is securely in place.

Step 7: Final Adjustments
l If necessary, adjust the angle or direction of the recessed lighting to achieve the desired effect. Many modern fixtures allow you to tilt the light slightly, giving you flexibility in your lighting design.
Safety Tips:
1.Always follow the manufacturer's instructions for the specific recessed lighting you want to install.
2.If you are unsure about any electrical connections, it is best to consult a licensed electrician.
3.Make sure the recessed light you choose is suitable for your ceiling type (e.g. insulated or non-insulated).
Maintenance and care after downlight installation
Once the downlight is installed, regular maintenance and care are essential for long-term stable operation and good lighting effects.
1. How to clean downlights
Clean the lampshade or lamp surface:
Use a clean, soft cloth or brush to gently wipe the surface of the downlight to avoid scratching or damaging the surface.
For areas with more dust, you can use a slightly damp cloth to wipe, but make sure not to let moisture penetrate into the interior of the lamp.
Pay attention to waterproofing: When cleaning LED downlights, you need to pay attention to waterproofing to prevent moisture from entering the interior of the lamp, causing a short circuit or damage to the LED lamp beads.
Avoid strong cleaners: Avoid using cleaners containing corrosive or strong chemical ingredients, which may damage the surface of the downlight.
2. Check and replace bulbs regularly
Check the bulb status: Check the light source of the downlight regularly. If you find that the light is dim, flickering or completely off, the bulb may be faulty.
Check the wire connection: Check the wire connection of the downlight regularly to see if it is firm. If it is loose or damaged, it should be repaired in time to prevent circuit failure or fire accidents.
Maintain a dry environment: LED downlights need to maintain a dry environment and avoid being in a humid or high temperature environment for a long time to prevent the circuit from getting damp or overheating and causing failure.
Avoid impact and vibration: Avoid impact and vibration to prevent damage to the internal circuit and components.
Replace the bulb:
Before replacing the bulb, make sure to turn off the power to avoid electric shock
Choose the appropriate replacement bulb according to the downlight model
Be careful not to overtighten the bulb to avoid damaging the electrical contact parts
Ensure the power of the bulb matches: When replacing the bulb, make sure to select the same power as the original bulb to avoid overheating or electrical failure caused by excessive power
Conclusion
Downlights are an ideal choice for modern home and commercial lighting. They are widely used in various spaces because of their simplicity, energy saving and high efficiency. Maintenance and care after installation are essential to ensure that downlights provide stable lighting effects for a long time while extending their service life. By cleaning and checking the status of the bulbs regularly, you can ensure that the downlights continue to perform at their best.
If you are looking for high-quality downlights, we recommend that you choose Togalonn brand downlights. We offer a variety of high-quality LED downlights that meet cETLus certification, Energy Star certification, ADA, etc., which can bring you a safer and longer-lasting lighting experience.
FAQ
Q1: Does the installation of downlights require professionals?
A1: Yes, it is recommended to be installed by a licensed electrician to ensure safety and performance.
Q2: How long is the warranty period for downlights usually?
A2: Most brands have a warranty period of 1 to 5 years.
Q3: How to apply for a downlight warranty?
A3: Contact the manufacturer or retailer with proof of purchase and a description of the problem.